Guide to the Lieutenants
Here is my guide to the lieutenants, the bosses, of StarFox64. This will provide you detailed information on how to kill them the quickest, and the safest. Using this knowledge, you should be abe to get that 10+ bonus from every single one. If you have a strategy that is effective against a certain boos, please send it in. I'll list it with mine and give you credit.
| Lieutenant Roster | |||
| Enemy Robot | Attack Carrier | Rock Crusher | SpyBorg |
| Goras | Shogun Warriors | Vulcain | MechBeth |
| Bacoon | Sarumarine | Gorgon | Andross |
| Bottom of Page | |||
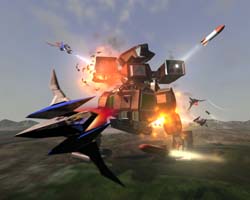
| Name: | Enemy Robot |
| Stage: | Corneria |
| Difficulty: | Easy |
| Description: | Large robot. Has rather thin and weak legs, and launches rockets which home in on you. Has some big device on it's back--I think this is what launches the rockets, I never paid much attention. The pilot taunts you continuously like you were just a worthless swine-herder. |
This guy is really not that hard at all. He will probably be the first boss you fight in the game. The battle is fought in all-range mode. He fires a blue beam from his head if you fly straight at him, and launches homing rockets from his arms. When you first enter, take a few shots at one of his legs, and if you don't destroy the leg on this pass, fly between his legs, and U-Turn [Down on stick and Brake] after a short distance. Just take out that leg, and he'll be immobilized--but not harmless. He will still fire rockets, and they can get annoying. Just fly back and forth over him, aiming at his back, which is is weak spot. On 1 or 2 passes, he should be dead. Not hard at all.
This guy wins the fun-to-fool-with award. You can blast off his head to stop him from shooting the blue beam. This rocks because he'll walk around in random locations because he can't see you. Its funny to watch. Now, you can also shoot off his arms to prevent him from launching rockets. This makes it even more hilarious as he walks around haphazardly and can even try to attack you. Its just funny :) Shoot off both of his legs and try to avoid missiles for awhile. If you leave his legs on, you can last until you get some measly hit+1 or whatever :)
| Name: | Attack Carrier |
| Stage: | Corneria |
| Difficulty: | Easy |
| Description: | This guy is a carry-over from the first StarFox game. He is easier than before, however. Consists of a maie hull with 3 attachments--one on the right, and two on the left. On the right is the hanger bay. It will launch little venomian ships at you. The two on the left each launch two missiles when open. |
If you have played the original StarFox, apply your strategy here. It is a bit different in respect to damage, but not much. Aim at the front of the hanger bay, and just start shooting. The pilot will order something, and it'll open, sending little venomian ships out to get you :) If you are firing at it, they will die rather quickly. This will also damage the hanger bay. It probably won't be destroyed now, even with hyper lasers, so as it's closing, get over to the missile bays. They will open, and four missiles will fly out. Destroy as many as possible, but don't worry too much if some get away. Just keep blasting at either the bottom or top one. This will close, soon, so head back to the hanger bay and be ready to finish that off. It'll break away, leaving only the missile bays. Resume firing at the missile bay you shot before, and it should be destroyed. Then kill the other to break it off. Then, fire rapidly as at the hull as it turns and falls back--you'll want to damage it a lot. It will turn and start to fire orange plasma at you. Barrel-roll to avoid it, or just dodge it, firing at the hull continuously. It should go down soon if you have twin lasers, but it takes a little longer with single. Rejoice as it crashes into the water! Still, not really all that hard.
| Name: | Rock Crusher |
| Stage: | Meteo Field |
| Difficulty: | Moderate |
| Description: | Space ship. Four wing-like projections, and a greenish-shield in the middle, which absorbs lasers. When removed, the 'wings' will charge an electric beam here. Two of the 'wings' fire missiles when the shield is intact. On the other side are two cone-shaped structures that fire ring lasers. This side appears to be the front of the ship. |
This guy gets the moderate level of difficulty, since unsuspecting and first-time players could easily be confused on what to do, and what not to do.
Part 1 First of all, you will see his spinning green shield--don't shoot this. It'll absorb your lasers, and after charged enough, it will spew green beams at you. Not fun. As it rotates, it will stop, and in the little niche of the shield will be a yellow triangle--shoot this. The shield will spin around revealing these triangles; when they are all destroyed, the shield will break away. You probably won't be bothered by the missiles. I have only had them hit me maybe once. Only if you fail to destroy the triangles the first time will they get the potential to be annoying.
Part 2 You'll here the pilot shout "How about this?" You'll see electricity flow from the wings into the center. This'll charge and fire a beam about 3-4 times. It only fires straight out, and the ship moves slightly, but stay to the side and you should avoid it. The first time it fires, a yellow circle will appear in the center--shoot this when the beam isn't firing. When the ship's lifebar is about halfway, it'll stop, and the pilot will "admit defeat." Don't fall for this crock-of-bull.
Part 3 Don't be fooled, he'll flip around and start charging up two cone-like objects. Yellow patches will open on two protruding objects on the top and bottom--shoot these. The cones fire ring-lasers that track your ship. When they start to fire, begin near the top, and move down to avoid them. When they get near you, just boost and hold down. This will avoid them. Just concentrate on one yellow square at a time. It will fall shortly. Not too hard once you can deal with it.
| Name: | SpyBorg |
| Stage: | Sector X |
| Difficulty: | Moderate |
| Description: | Robot with just a body, two large arms, and a head. Two laser guns protrude from the side of the head, with two, diamond-shaped yellow eyes in between. Tosses blocks at you, and shoots blue lasers, as well as punching and various other attacks with its arms. |
First off, avoid the two arms as they fly in from the sides. They can actually hit you if you do something stupid. You'll hear it shouting something about enemies, and it decides you are an enemy. It'll fire a field of blue laser from its cannons, which is easy to avoid, but does a fair amount of damage if you don't. So do. The weak spot is its "eyes." Shoot these when the front of the head is facing you. The arms will try to punch you, grab you, and various other not-so-fun, lose-your-wing type attacks. It'll also throw blocks at you--these are rather easy to avoid. After you "destroy" it. It'll hang there for awhile and get back up. It's head is the weak point again, and it's lifebar is half-empty. Drain it quickly. There are some nifty attacks in this state, like when he spins around with his arms extended to the sides, but you won't see them if you are efficient. Twin lasers will bring it down rather fast, and even single packs a punch. Slippy will fly in when its life gets low, and you better kill the thing soon. If not, it'll launch slippy off to Titania. Just keep firing rapidly, and keep your sights over its head, and it'll be toast.
| Name: | Goras |
| Stage: | Titania |
| Difficulty: | Strong |
| Description: | Large, insectoid, weird thing. Has four tentacle arms, two of which fire lasers. One of them has slippy's ship in its grasp. Has an armor on it that is impenetrable. Its head fires a laser, and its limbs regenerate. Very hard to destroy without a good stock of bombs, thus the strong difficulty rating. |
Bring along at least 4 bombs. It is very difficult to kill without them. You need to blast off its limbs first. To do this the easy way, launch a bomb and nail the center of its chest. This isn't so easy, but it'll knock 'em all off if done right. If you don't destroy one, fire at the tip of it. That is their weak point. Once all the limbs are off, you can fire at its chest plate to open it. Fire away at its heart, and use your bombs when it turns around. This will kill it quickly. If you want to do this the hard way, roll to the left to avoid the tail slap. And constantly roll when the limbs are firing. They fire 4 bursts of 3 lasers. Shoot them when they aren't firing. They will only regenerate if they are all off. Bombs are the way to go to kill it quickly.
| Name: | Shogun Warriors |
| Stage: | Sector Y |
| Difficulty: | Moderate (normal) Medium (expert) |
| Description: | Multi-Part battle. The Shogun Warriors are colored blue and gold. They look much liek the armored troops earlier in the stage, but are a bit harder. They have a gun and a shield. The Shogun Warlord arrives on a ship, and is a white-colored armored troop. His weapon is improved as he is much faster. He takes less damage while his shield is intact. |
These guys are a medium on expert because it's really easy to lose a wing, and it's hard to hit the Warlord with the single laser and a hindered flight capability. This battle is fought in all-range mode. The two warriors are first. Fire at the blue one right away, as much as possible, then turn to avoid crashing into him (especially on expert). Keep your back lined up with his dot on the radar, and U-turn soon. Fire at him again--he should die on this pass. Find the gold one, and do the same to him. Wow. That was way too easy. You'll get a +3 bonus for each one
Enter Shogun Warlord You switch to a cut scene and hear "Don't pahty just yet." In comes a ship which launches the Shogun Warlord into the fray. Chance are, you'll be facing away from him, so pull a U-turn quickly. Use your radar to look for him, but he moves fast, and the big B isn't a good representation of where he is. His shield protects him a bit, so try not to hit him there. It'll be destroyed when his lifebar is half-empty. Avoid his laser--it is quite powerful if you are being hit--but do try to keep him aiming at you. He will fall back, but he's standing still, and you want him that way; just make small adjustments to avoid his laser. Fire rapidly at him and you'll do a lot of damage. Once his shield is gone, his life will go down very fast--Unless you have single laser.
Want to kill him even easier? Just let him go for awhile. Eventually he'll say "I'll take you on from the ship" He'll just stand there, firing around. He is a sitting duck. Move in on him and fire away. If you have twin or hyper, his shield'll be gone, and so will he. He'll only do this if you don't hit him for awhile. If you don't fire at him at all he'll get on the ship, and you'll will kill him in time for the 10+ bonus, so do so if you wish.
| Name: | Vulcain |
| Stage: | Solar |
| Difficulty: | Medium |
| Description: | Big red guy. Has two long arms with pointy ends. Spews fire and rocks at you. Rather annoying to fight. |
First off all, don't get too close to the sea. It's hot down there, and you'll probably not live through the battle. His arms are his weak point. Stay up until he is fully out of the lava and ready to attack, otherwise you won't damage them. Fire at the left arm first, and do so quickly. Getting one arm off is important. After this arm is destroyed, he'll stumble about for awhile. (You can't damage him now). Move over to the other arm and destroy that. Note, the left arm is on your left, and the right arm is on your right.
That makes it sound easy, but it isn't. His right arm will try to strike you, but if you stay to the left, it will miss. His left arm will pull back at swing accross at you. The only way I have found to avoid this is to boost forward and down (Not a good idea...it's hot down there.), or somersault. Practice timing this right, and you should not get hit. At other times, when his right arm comes down, a solar flare will be sent your way. He will sometimes spew various rocks at you. Shoot these, they give you health sometimes, and even the elusive supply star. He dives into the lava often, and sometimes sends a big wave at you, Make sure you stay in one of the upper corners--you should brake or boost, or better yet, somersault, if you think you will get hit.
After the arms are gone...When his arms are gone, his attacks will change--and so will his weak point. Aim around his mouth to hit him. He will spin around and launch flaming balls at you. These are surprisingly easy to avoid. Other times, he will just jump up from the lava, and dive back in. He will also send a twirling line of flames at you. Just head left or right of this, or try to go through the middle. This part is more of a test of endurance, than skill. His attacks aren't particularly difficult to avoid.
| Name: | MechBeth |
| Stage: | MacBeth |
| Difficulty: | Strong |
| Description: | Flying craft attached to a train by a strong rope. Has two wings, a hook on its tail, and a nasty disposition. The train can't stop quickly, so exploit this for an easy kill. |
The easiest way to finish this freak off is too switch the tracks. The last four switchs appear after you get into this fight. Switch them all, blasting away spears and avoiding its hook to switch the track and reap a nice 50+ bonus. When you flip them all, shoot the switch box (has eight lights) to open it, then shoot the lever on it.
Of course, we aren't all good enough to find and hit all the switches, so, here's the down-and-dirty way to get him. He'll taunt you and laugh, but that doesn't mean he's easy. He has a few nasty attacks. He'll charge up with little pink energy, and drop spears all over your path. Lock onto one and fire a charged blast to destory a lot of them. You won't get any hits, however. Also, he will fly towards you and scoop you up with his hook, then drop you. Roll left or right a lot to avoid this. I'm not sure if this attack occurs in both parts, or just the second, but he will also flip his wings and send a large field on energy from them. Stay in between this as best as you can--it does a lot of damage if you get hit. Just turn normally, don't boost or roll--it is easy to overcorrect. Aim for his tail and his head--those are his weak points. This can be tricky, but it is not all that hard. The hook should be your first target.
After dealing plenty of damage, it is time for phase 2. He does the usual spear attack, and the energy field, but there are other hazards. Make sure you shoot down the flying ships when your wingmen get into trouble--these guys give you extra hits, so if you want to, you can prolong the battle until you reach 150. This takes forever, though. The train will drop little energy boxes along the way. Shoot these quickly. The white flame extends far and deals a lot of damage. MechBeth will also drop those explosive cannon balls that are oh-so-familiar. Just do your best to avoid them--their fall is hard to predict. You can shoot him all you want, and not do any damage. Once in awhile (quite often, in fact), the train's back will change, shoot this a few times, and MechBeth will be weak to your lasers. Shoot him quickly. It'll take about 3 repetitions to destroy him if you aim well.
| Name: | Bacoon |
| Stage: | Aquas |
| Difficulty: | Medium |
| Description: | A big clam which shoots pearls and has pods that spit out snakes. |
This guy will throw tons of stuff at you, but it is surprisingly difficult to get hit... Aim for the pods on the top of the shell first. These give you 3+ bonuses each. They will also spew water snakes out, but if you are following the perferred method of firing lasers and torps at once, you should have no problem destroying them as you blast away the pods. Make sure you do destroy them though. They can surprise you as they crash head-on into your sub. Once the pods are destroyed, you can concentrate on main clam.
Bacoon As cued by your wingmen, aim for the two pillar-like muscles holding the top shell on. Fire away with youir lasers and torps at one of them (although the torps won't damage it yet). Eventually it will solidify. If you have been firing torps, one should be locked onto it and will soon blast it away. Make sure that you blast the pearls too--they can damage you if you don't, but they will give you health occaisionally. Repeat this for the other muscle, to break of the top shell.
The terror inside. Now is the fun part. Concentrate on the center of the lump in the middle until it opens; you should lock onto the eye, and if you are firing torps all the while, one should sneak past the pearls (which are getting rather think and annoying by now) and strike the eye. About 5 or 6 torp hits will kill it, but the shield regens after each hit. You can kill the pearl-launchers too, but they regen way too quickly to make it worthwhile. The pearls shouldn't hit you, anyway.
| Name: | Sarumarine |
| Stage: | Zoness |
| Difficulty: | Strong |
| Description: | A submarine. Has a scope (You have seen it earlier in the stage, probably.), and a big ball on a chain. On the back is a crane, which can replace either cannon if needed. On both sides are a float with a cannon and a depth-charge dropper. Two exhaust pipes are attached to the main hull. |
Bombs are not only helpful in this battle, they are a necessity. But fret not, the cannonballs give you one bomb a piece. The depth charges also can give you health, so shoot them if you get low. First off, he'll launch his ball-and-chain at you. Just roll to the left or right, and you'll avoid it. Then it will begin to fire off its cannonballs and drop its depth-charges. Blast the cannonballs to get a good supply of bombs and then bomb the three lights on the hull, between the exhaust pipes. This will destroy them both. If you happen to destroy a cannon (direct hit down the barrel), it'll submerge and launch the ball-and-chain from under the water three times at you before resurfacing with a new cannon attachment.
After the exhaust pipes are destroyed, it is safe to target the cannons. Build up a supply of at least 5 bombs, then nail a cannon directly. The blast will destroy it, and rock the ship a little. You'll hear "Drop the crane, Now!" and the sub will turn to drop the crane and pick up a new cannon. Unleash your bombs on the base of the crane to destroy it. It seems to take about 3 on normal, and 4 on expert. You hear him say "Oh, shoot!" when you destroy it; this is your cue to stop bombing. Chance are, it didn't get the cannon attached in time, but this does not matter. Destroy one with a bomb (shoot cannonballs if you need some), and then stockpile 9 bombs by shooting cannonballs. When you have 9 bombs, shoot the next cannonball, then bomb the cannon to destroy it, and collect the bomb (You'll have 9 again.). Save these bombs for use in other stages (MacBeth and Area 6, in particular.). Now, the hull is weak, fire as quickly as possible, and barrel-roll to avoid the plasma, and move left or right to avoid the ball-and-chain. He'll be dead in no time.
| Name: | Gorgon |
| Stage: | Area 6 |
| Difficulty: | Hard |
| Description: | A large, ball which opens to reveal a core. Has tentacles, launches ships and missiles, and emits a powerful laser. A fun thing to fight, but a real pain to kill for a time bonus. |
This thing is a real blessing to fight. The fact that it takes so long before you can really damage it is just annoying. I'll go through the drill.
Phase 1 The disk will appear, and open its core; shoot the energy balls until they are gone--this will damage the thing a little bit. Then the core will close (even if you didn't destroy the balls), and the tentacles will try to slap you and other nasty things. Aim for the claw to destroy them. If you fail to destroy all three, it'll launch a whole ton of missiles, and fade out. Move in a circular pattern to destroy the missiles, and kill the closest ones. It'll reappear. Finish the tentacles off now, or prepare to fight more missiles.
SubPhase 1 The disk will then reappear and spin around, launching more missiles than you though there were in the game... Launch a bomb to destroy a whole bunch if you can't take them any more. Eventually, it'll stop and continue with its attack.
Phase 2 Again the core will open, and the energy balls will circle. Destroy them again to damage the thing a bit, and then deal with the tentacles when it closes. If you don't kill them in time, it'll launch 6 ships at you. These will fire lasers, and can crash into you, so destroy them. Unfortunetely, they won't give you any hits. After this is when the real fun starts
SubPhase 2 The core will open, but this time, it'll begin to charge a powerful laser. Circle around the screen, barrel-rolling to avoid it. The ship moves to aim at you, and if you do this, you'll move fast enough to prevent it from harming you. After awhile it'll power down and prepare for the biggie.
Phase 3 The core will open, and you'll be advised by Peppy (If alive) to destroy the 3 energy balls; do so. Watch out, whenever you hit them, they reverse their rotation. After destroying all of them, blast the center ring of the core as much as possible. Aim there, and pound that A button till there is no skin left on your finger. If you have twin or hyper lasers, you'll destroy it. If you have single, then you won't, but it won't have much life left. When the core closes, destroy the tentacles, and you head back to SubPhase 2. You should be able to destroy it the next round.
This is perhaps the most lengthy boss battle in the whole. You have to aim near-perfect and destroy the core in the first visit to Phase 3 just to get the 10+ bonus. Even the 5+ is pretty hard to get. Especially if you have single laser and a broken wing. The only way to get good at this guy is to practice a lot. The missiles aren't so bad once you get used to aiming quickly and accurately. This one is a real test of skill.
| Name: | Andross |
| Stage: | Venom |
| Difficulty: | The Boss! |
| Description: | Well, this all depends on whether or not you get the real Andross of the Andross kl0n3. To stay basic, I'll just say he's a big monkey head--sorta resembling those of the monkeys in Planet of the Apes. He's got two hands, and likes to eat arwings. I think I'll list this several ways. You get the real Andross on Venom 2 and the kl0n3 on Venom 1. |
King of Apes, Andross is not really that hard to fight. Once you know how, he is a cinch. Frankley, after I figured some stuff out, the head part was easy. And the kl0n3's part 2 was really easy. Only his true form took awhile to figure out, and he really isn't hard once you get your patterns down.
The Face of Andross First of all, start to shoot at the hand on your right first. This always seems to be the easiest to hit. Just aim at the little flashing square, or between the fingers...sorta around the knuckles. He'll punch with the right hand first, just barrel-roll and move up after he starts it, and it'll miss. Then he'll slap you with that hand--do the same, but move a little to the left too. He'll follow by punching with the left, just barrel-roll up again. Then he'll "clap" his hands together and begin to suck rocks in. Before he does this, press and hold the brake while tilting towards one side and pressing that direction. You will auto-brake when the gauge refills. This'll let you avoid being sucked in. Don't let that happen. You can launch a bomb directly into his mouth when he starts to suck you in. He'll stop, much on the bomb, and get all red in the face. Whatch the steam come out of his ears. Anyway, he'll start chewing and then spew out some rocks. Shoot his right hand till it's gone, then target the left hand. He'll spew out rocks if you didn't launch a bomb into his mouth. Just shoot some, as you could get some health or a bomb, then blast away at the left hand. He'll punch you with it, just avoid like before, and start to brake and avoid the suck--it happens almost immediately after he punches. Destroy the left hand, and spend some time avoiding the suck, and shooting rocks till you are around full health. Then shoot his eyes all the while to knock off his health. You can shoot his eyes before you destroy his hands, but it doesn't do much. He'llrub his eyes, and shoot out a bolt of lightening from his right hand, but not much else happens. Depending if you went to Venom 1 or 2, you will face a different second part.
The kl0n3 Face This is the Venom 1, easy course second part. Nothing grand happens by killing him. This guy is so easy it isn't funny. Just shoot somewhere around his eyes; I've never paid much attention where exactly, but he'll flash red when you find the spot. He'll charge, but just barrel roll all the way to the left--you have more room to do so than you probably think. Then resume firing. If you have hyper lasers, you'll probably kill it before it charges the first time. You'll get the worst of the endings when doing this on normal difficulty. Big whoop-te-do.
The Core Brain This is the biggest of the bad; the true form of Andross. You should probably piddidle your way around this guy before referring to my guide. It's really fun. If you have around 8 lives to burn up, take about 4 of them and figure out how to kill it yourself :) Then if you are stuck, ask me for some help. What follows is the spoiler. Don't look unless you really feel like being spoiled.
Okay, you asked for it. This guy is composed of a big brain, with some tendrils under it. He has two eyes conected to electric beams. He can't be hurt until you destroy his eyes. So, why don't you destroy his eyes. If you piddidled your way around, you probably couldn't figure out how :) I had 14 lives to burn, and I was down to about 6 or 7 before I got it figured out.
How to kill the eyes Okay. start off the match by heading towards the left of the brain and go past it by a bit. Then do a sharp turn to the left, and look for the eyes, shoot them a bit, go above or under the electricity. Then start sharp turning to the right. You will now be following them. They should never be able to catch you again. Just keep firing; they will give you a 5+ bonus each. Be careful, occaisionally, their path will lead you into the brain, but if you followed what I told you to do, this is rare. Ah, so now the brain is by itself. Pididdle around tryign to kill it. Don't get caught in the tendrils.
Still stuck? Killing some brain cells Okay. Start to do a sharp turn around to face it. There is a large potion on the base of the back of the brain. This is the weak point. Shoot it a lot as you near it, then go past. Perform a continuous sharp turn in the same rotation as the brain (clockwise/counterclockwise). You will eventually meet up with the spot again. Shoot it. If you shoot the brain and not the weak point, it'll probably warp a distance away; just turn around and shoot the weak point if you can. As you pass, repeat the process until it's dead.
After it's death, you will be "destroyed" along with Andross. You are not done yet. I'll give you a hint. Have an itchy boost finger, and don't sharp turn unless absolutely necessary. Have fun, and if you do this on expert, you'll get the best of the endings.
That concludes the boss strategy portion of this guide. Hope you gained something from it. I wish thee luck. Please send in your own strategies. They could help other people out!