 |
Radius: 3,354 km Albedo: .17 Gravity: .56 Esc Velocity: 7.23 km/s Equilibrium: K 283 Atmosphere: N250 + CO221 + CH422 Hydrographics: 90% Biomass: 1,670 Quads Class: T |
 |

|
Radius: 3,354 km Albedo: .17 Gravity: .56 Esc Velocity: 7.23 km/s Equilibrium: K 283 Atmosphere: N250 + CO221 + CH422 Hydrographics: 90% Biomass: 1,670 Quads Class: T |
|
| Name: | Zoness |
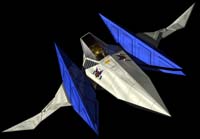
| Vehicle: | Arwing |
| Difficulty: | Medium (normal) Strong (expert) |
| Hits for Medal: | 250 |
| Soundtrack: | 13 |
| Description: | Once a resort planet, Zoness has fallen pray to the whims of Andross. His attempt to make a supply base and drill for oil have completely polluted the planet. Various lifeforms have mutated drastically, and most attack on site. | Briefing: | Your mission is to sneak up on Andross' supply base and destroy all that you can. There are searchlights on the planet that are used to detect trespassers. Destroying these will give you the element of surprise and will allow you to sneak through Sector Z. |

Silence is Golden - Exploring Zoness
Start to First Searchlight
Destroying All Searchlights
First Searchlight to Katt's Appearance
Katt to End of Rock Maze
Rocks to Checkpoint
Checkpoint to End of Barges
Barges to Katt
Tripping the First Light
Difference from Islands to Checkpoint
Differences from Barges to Katt's Last Appearance
The End is the Same
Katt to Sarumarine
You can have some strange combinations of what appears and what doesn't in this stage depending on if and where you are spotted by a searchlight. I will cover this in three main sections. The first one will be from the beginning to the first searchlight. Then I will cover the stage from two viewpoints: destroying all searchlights, and missing the first.
Start to First Searchlight: A lot goes on at this point. When you first enter, five little twirly bugs pop out of the water before the set of two rocks. Just past the right, many many seabirds will fly past. There are approx. 8 that come from the right, in a nice, neat, jagged line, and about 4 move will come from the left, where the first island is. At the same time, 3 will come from behind on the righ side, and 2 TriFish will jump up and spew a lot white plasma at you. These things can take some punishment; about 3 charged blasts to kill them, or one bomb. They each give you a hit+5 and a bomb for your trouble. As soon as you reach the second island, expect a few twirly bugs, and you'll see a box on a crane. Shoot this before it drops into the ocean to get a gold ring; same thing holds for all other boxes on cranes. Just after the next island, about 4 twirly bugs jump up, and a big water strider comes from the left; blast his head with a charged blast to get a... hit+2 or hit+3...I forget, and a bomb. Congrats. You are at the first searchlight, and you've barely gone anywhere in the stage. I told you a lot happens.
First Searchlight to Katt's Appearance: Destroy the first searchlight; it will give you a +2 (If you've triggered any searchlight, no searchlights give you a bonus.). The next searchlight is just a little to the left of the first, past the next island. The third is further to the right of the 2nd. After three more islands, the 4th light is in the center. Up ahead, you will see some platforms. There is a searchlight to the left of the first one, and a strider will appear there. Blast the strider if you wish, and then destroy the searchlight. It is in front of the left platform. Head under the right one to destroy the next searchlight A strider will cross here, too. I think there is another searchlight on the left, I can't tell from my pencil map; it could be a rock :). Slippy gets in trouble here as three birds chase him. There is one chasing you, too. Lotsa little shrimpies jump out of the water, low to the surface here. These won't harm you unless you decide to boost into them. After the shrimpies is a line of three items. Get the bomb on the bottom, and move straight up to collect the silver ring too; there are enough gold rings in this stage that you can miss the one here. Just afterwards, Katt will come into the fray.
Katt to End or Rock Maze: Katt will take out the searchlights that are on the left, so you only need to concentrate on the ones on the right. Your first one is at the far right, just right of the first set of rocks. The next one is more towards the center. You'll head right again to take out a third, and then back to the center. The Blue Bomb bird is here; you can shoot it to make it drop its bomb. The next light is to the right of the nested pile of three rocks, and there is one just behind that pile. Take out the light on the left, since Katt has gone, and head right to take out two more. You'll see Slippy swoop down in the center, where the final light is.
Rocks to Checkpoint: A sea serpent will arise from the water several times. Stay low to head under the arches it makes, and shoot shrimpies. After it crosses your path 3 times, there will be some lights on the left. There will be one on the right, too. Katt gets into some trouble; shoot the seabird that is following her. She will shoot down some of the next lights. The serpent will cross a few times more, and after the light that Katt doesn't shoot is the checkpoint.
Checkpoint to End of Barges: Just past the checkpoint, the sea serpent will cross, coming from the left. To the left will be a light by a rock and up ahead is a gate. Peppy will raise the gate; if he is not there, stay low to the sea and shoot one of the wheels to lower the gate. Get the laser upgrade and stay low; fly under the serpent to shoot the next light. There will be a light to the left, then two gates. Stay low and lower the right gate to shoot the searchlight behind it. A sea serpent will cross from the left; shoot the light that is there, too. ROB64 will hail you right before the next gate; behind is a silver ring. After you shoot the crane's box, get what is in the supply container. Beyond is the first barge. You can destroy the boxes for hits and items like bombs and silver rings. Just past it, three scouties will come from the right. After passing the barge, a persistant enemy will come from behind; somersault to shake it off. The next barge has two cranes with boxes (these won't give gold rings), and three more scouties will come from the left. After the 3rd and 4th barge, two seabirds will fly towards the left, coming from the right. The last barge has a gold ring in the rear box.
Barges to KattJust left will be a rock; 3 seabirds will come there, and Slippy will fly ahead; follow him through all arches to make a laser upgrade appear in the last arch. Lock onto the enemies right of the third arch, and bomb the platform to the right of it to clear those off. After the last arch, a platform on the left will have boxes and a raised platform on the right has many more. A group of 5 scouties is on the left; Katt will come in here too.
Differences from Islands to Checkpoint: 4 attack scouts will come from both sides on the islands. You'll see the Sarumarine's periscope looking up from the water (it will reappear at various points). At the line of three items, two groups of 2 attack scouts come in, one on each side. Just past the first few lights are two watertanks, again, one on each side; five attack scouts will fly towards you here. Further ahead, near the end of the rock maze are 2 more watertanks. When you see the next searchlighs, 2 groups of 2 attack scouts come, the same thing happens just after the checkpoint.
Differences from Barges to Katt's Last Appearance:
After the third barge, four water tanks will come towards you. There are three heading left after the fourth, and three or four heading towards you to the left of the last barge. Between the first 2 arches that Slippy leads you through are 3 watertanks. Two watertanks are to the right of the last arch (where the laser upgrade appears), and 2 are behidn it. There are 4 or so watertanks under the raised platform with the boxes on it, that is on the right side of the field.Katt to SarumarineAfterwards is a barge and a raised platform; Katt will clear it off, except for the last box, and 5 scouties will come. Ahead are 2 towering arches and a long platform beyond. 2 saucers are left and right of the long platform's tower; they shoot a lot of lasers before flying away. 5 watertanks will come from behind to rest before the next large structure. 2 saucers are to the left and right. There are 2 long platforms beyond. A saucer is underneath the second, and 4 watertanks come from behind to rest just after the last platform; there is a large flatbed to the left and a scoutie flies towards the right. Destroy the boxes; in the last one is a gold ring. Afterwards, 5 tanks will rest in front of the next few structures. Beyond, 3 watertanks come from the right, and 3 come from the left as you reach the next crane-with-a-box. Past this are more structures and lights. A bird with a bomb is here, as are a few shrimpies. Falco will shoot the hard-to-reach searchlights if you didn't miss any, so you only have to get the two in the center. Beyond is a field of depth-charges, and the Sarumarine, a strong-armored submarine.
Sneaking a Medal
| Required Hits: | 250 |
| Checkpoint Goal: | 135-150 |
| Hits Before Boss: | 239 |
| Point Getters: | TriFish, Striders, Untriggered Searchlights |
This stage can be quite difficult to get a medal on. While the extra enemies you get after triggering a searchlight help make up for the lack-of-bonus you'll get from destroying the triggered searchlights, It is quite difficult to kill enough of them to get your medal. The preferred choice is to destroy all of the searchlights; this is much easier. However, the best way to get over 250 is to destroy all searchlights, except miss the one that is right before the last gate. This will allow you to get a horde of bonuses, then destroy the multitude enemies afterwards. There are only 4 searchlights after that light, and most of the extra enemies appear afterwards, so do this to ensure victory.
The first part of the stage can be vital in decided whether or not you get a medal. Blast all the twirly bugs with lasers, and try to take out as many birds with charged blasts as possible. As soon as you see a TriFIsh, lock onto it and blast it with a bomb. This will kill a few seabirds, and will destroy both Trifish (hit+5 each), and you can get two bombs from this. Kill all twirly bugs yous see in this course. When you get to the water striders, charged a blast,.and lock onto their heads and fire. This will kill them. Later on, when going through the arches, charge and fire manually when they are right in front of you. Just past the archs, many shrimpies will jump out of the water; stay low to the surface and fire away to kill many of these. When Katt comes, wait till you can se her high up on the right side, then hold your boost down to get ahead. Procede to blast every searchlight in the maze; you won't get points for those she shoots, so beat her to the punch.
After the rocks, stay low and go under the serpents. Keep firing; there are shrimpies in many places. When Katt gets in trouble, boost ahead and kill the searchlights she will shoot. Kill the bird on her back if you feel like it. After the double gates, miss the searchlight. This will enable you to get many more points than normal. Shoot the crane's box. When you get to the barges, lock onto one box and fire, then shoot the other box a few times before the charge hits the other, so both boxes get destroyed. You'll get bonuses for doing this, but it won't work on the barge that holds the boxes on cranes. Lock onto groups of enemies here, and bomb when you see the first group of watertanks; this will kill all 11 or so of them and will also clear off the last barge. Lock onto the next group of sea birds, and do likewise for the watertanks as Slippy leads you through the arches. Blast the boxes on the platforms, and lock onto the groups of 5 scouties. Bomb under the platform that has 5 or so watertanks under it, and bomb the large platforms that have many boxes. When you get to the long platforms, wait for the tanks to get out from under them, then bomb; you will destroy all of them. Do the same for all of them. At the next crane, shoot the box, and lock onto each group of tanks. Shoot the searchlights at the end for a few more points.
Unexpected Arrivals - Expert Mode Additions
Expert mode truly baffles me. There aren't many enemies added to it. All they do is fire more. If there is anything new of note in this stage, email me. I can't tell.